Setting Up Wireguard VPN in Raspberry Pi
This tutorial will help you setting up a Wireguard VPN on Raspberry Pi by using PiVPN installer. This article will use Raspberry Pi OS (Raspbian) for installation. The PiVPN site claims the installer will also work on Debian and Ubuntu.
I choose Wireguard over OpenVPN due to the convenience of connecting though QR code. In OpenVPN, you have to transfer security key via USB stick and some extra works to transfer it to a phone. However OpenVPN has the option with more encryption bits, but more encryption bits will cost more to compute and slow the transfer time. You can find out more in the PiVPN website.
I assume my audience have little background knowledge, so hope you can follow this without any problem. But I do not assume that you know how to type in the terminal.
You will need the followings:
- Raspberry Pi
- The essentials are Raspberry Pi board, micro SD card, power cable and adapter.
- Your Raspberry Pi will need some forms of the Internet access, either trough WI-FI or ethernet.
- Have access to your router
- A modem is connected by the cable through your wall. A router is connected by the modem. Search the model up if you are not sure which one is router and which one is modem.
- You will need login to your router homepage. This is router brand dependent.
- A domain(optional, but highly recommended)
- The alternative NOIP option (free tier) requires you to active it every month, which is annoying to me. Having everything in control is neat, isn’t it?
- A domain will be used for setting up DNS entry.
- One domain can have multiple usage, such as setting up website. So do not be afraid the domain can only be used by this set-up.
- (If you have a domain) Setting up a A-record for Dynamic DNS(DDNS) usage.
- (If you do not have a domain) Setting up NOIP for DDNS.
- Install PiVPN.
- Setting up a static private IP for the Pi in the router.
- Setting up port forwarding in the router.
About Dynamic DNS (DDNS):
For analogy, a domain is the name of your address, like White House, and the IP is your actual address, 1600 Pennsylvania Ave NW, Washington, DC 20500. Remembering a IP address is harder than remembering a domain name. Even you can remember it for one time, our home IP can be changed over time. So our resolution is to have a domain name, e.g. exmaple.com, myblog.io, hello.cc, points to your IP address, and update it whenever your IP has changed. This is called dynamic DNS.
If you do not have a domain, I recommend you set it up with NOIP first to make sure nothing is bugging you.
When you have a working VPN connection, uninstall the PiVPN and reconfigure it with your own domain if you want.
I recommend you uninstall the PiVPN rather than reconfigure it. I have to uninstall it to solve some unknown bugs during reconfiguration.
Setting up with NOIP
Go to NOIP website, after completing registration, create a hostname.
You will need to enter your home IP address. Your public IP can be obtain by googling “my ip”.
Please remember your entered domain. The setup is complete for the first installation. Depending on your system, you will need to read how to automatically update the IP address in the NOIP website.
Setting up DDNS with Your Own Domain
Buying a Domain
You will need to buy your domain name from some registries. You can do more research on this. Be cautious about the first year price and the renewing price. Some registries have a cheap first year price and higher renewing price, which costs more sustainably. I personally use NameSilo because it is cheap for a .com domain for me.
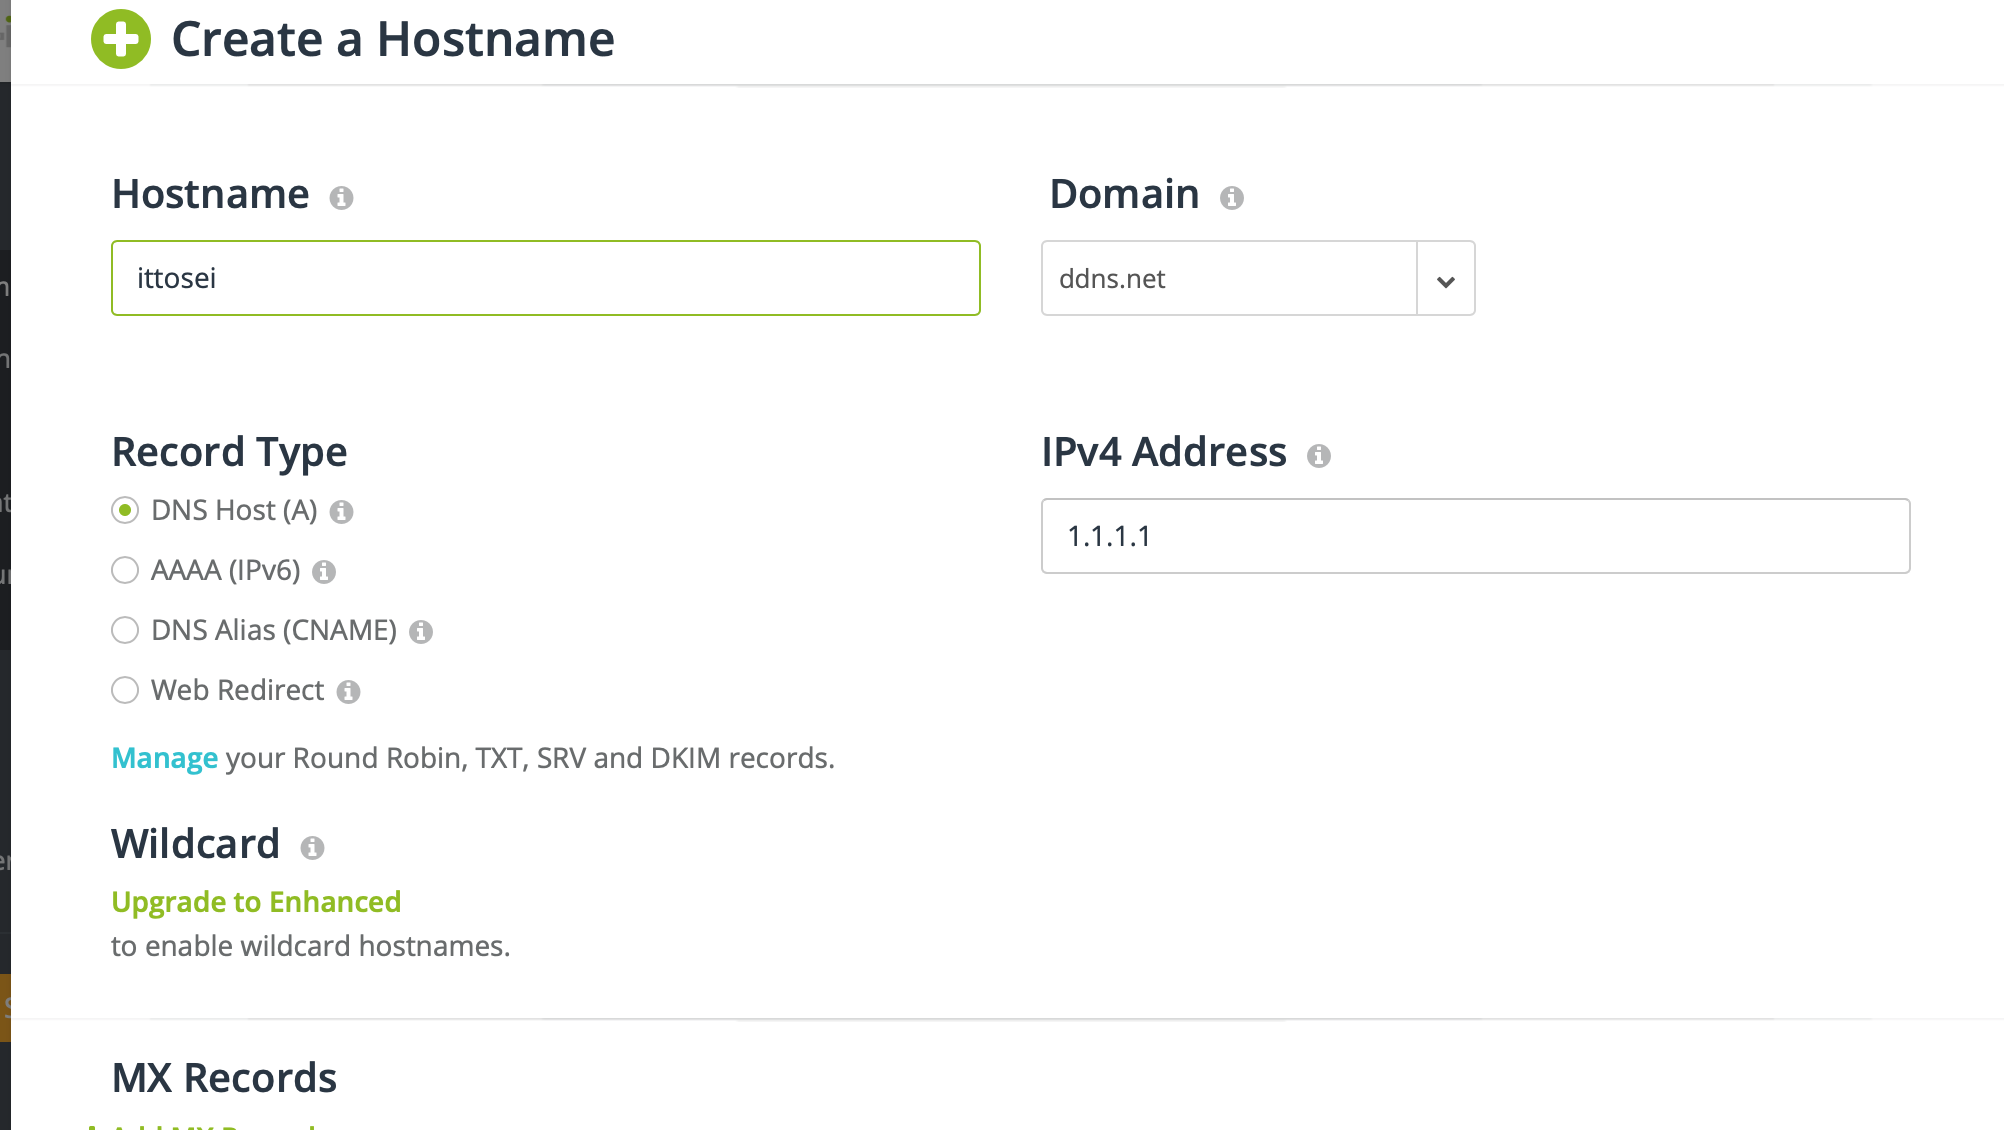
Adding a DNS Record
You will need to add a A-record that points to your home IP address. In NameSilo, it is under Manage DNS.

ittosei.com is my apex/naked domain. Every domain that is in front of my apex domain is called subdomain, e.g. example.ittosei.com, ddns.ittosei.com. My apex domain is used for hosting my blog, but you can also use your apex domain for DDNS.
You will need to enter your public IP in the IPV4 entry. Your public IP can be obtain by googling “my ip”.
You do not need to concern about the TTL, leave it as default.
Set up PiVPN
Installation
Open the terminal or SSH to Pi and run the following commands:
curl -L https://install.pivpn.io | bash
Press space to select an option.
Press enter to confirm.
Setting up Static Private IP for Pi
When encountering DHCP setting as following:

Please take the note of the IP address and we will set it up as static.
The Internet is in the same scale as post office. It is meant to be a world wide communication. Your public IP is your home address. But what if you only want to communicate within your house? All devices in your house has its IP address.
Just like your public IP, your private IP also changes over time. It is due to the inactivity of the devices and the choice of your router. But fortunately, we can set it as a static IP at not cost. This is set by the router.
Go to your router home page, find something like DHCP(Dynamic Host Configuration Protocol) IP reservation, or static IP. Set your Raspberry Pi with the IP above.
You can also choose no to let the software to set it up. But manually set it up in the router is the better choice.
Select User
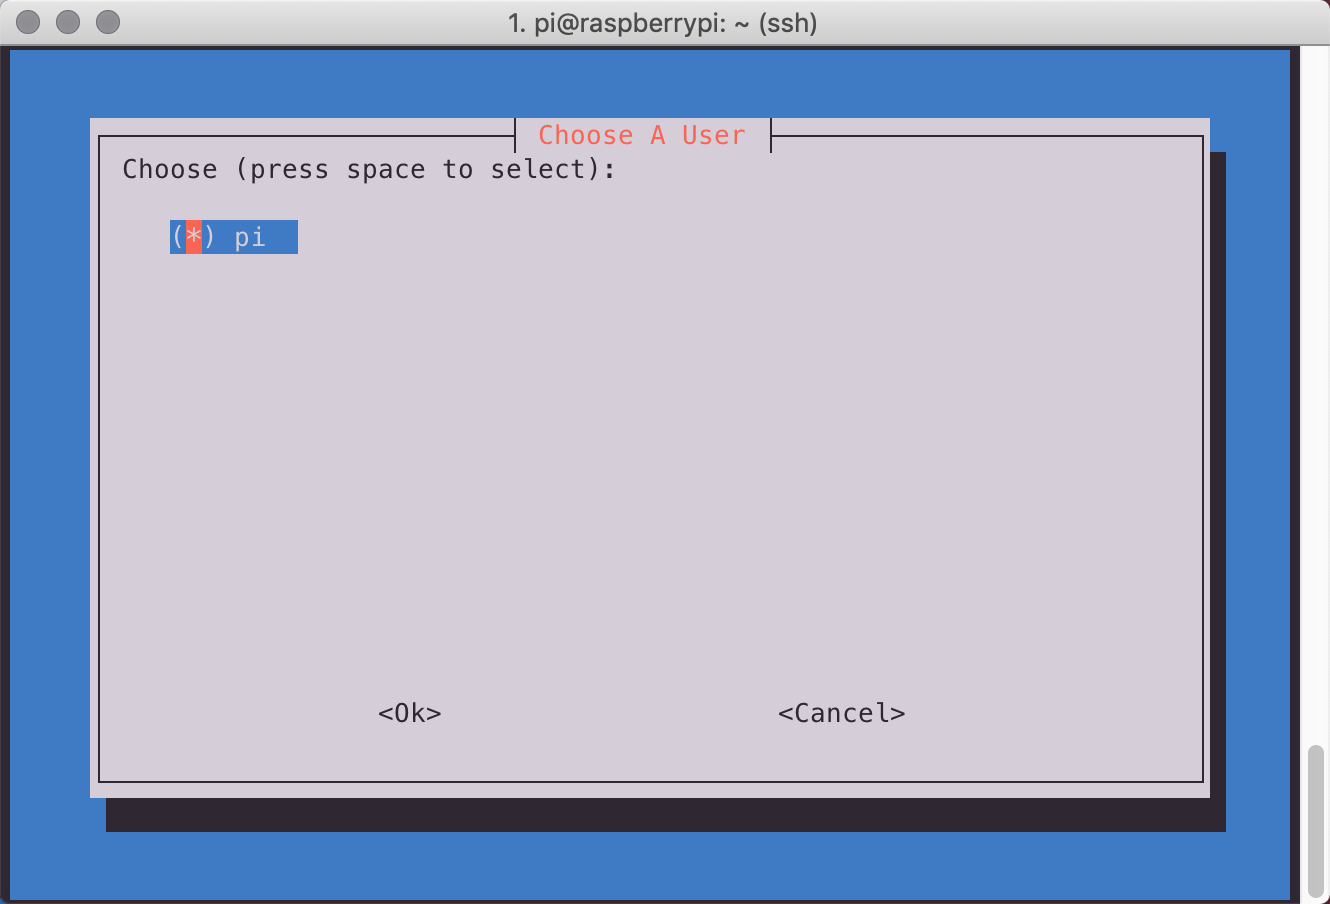
Press space to select a user, then press enter.
Select VPN Protocol
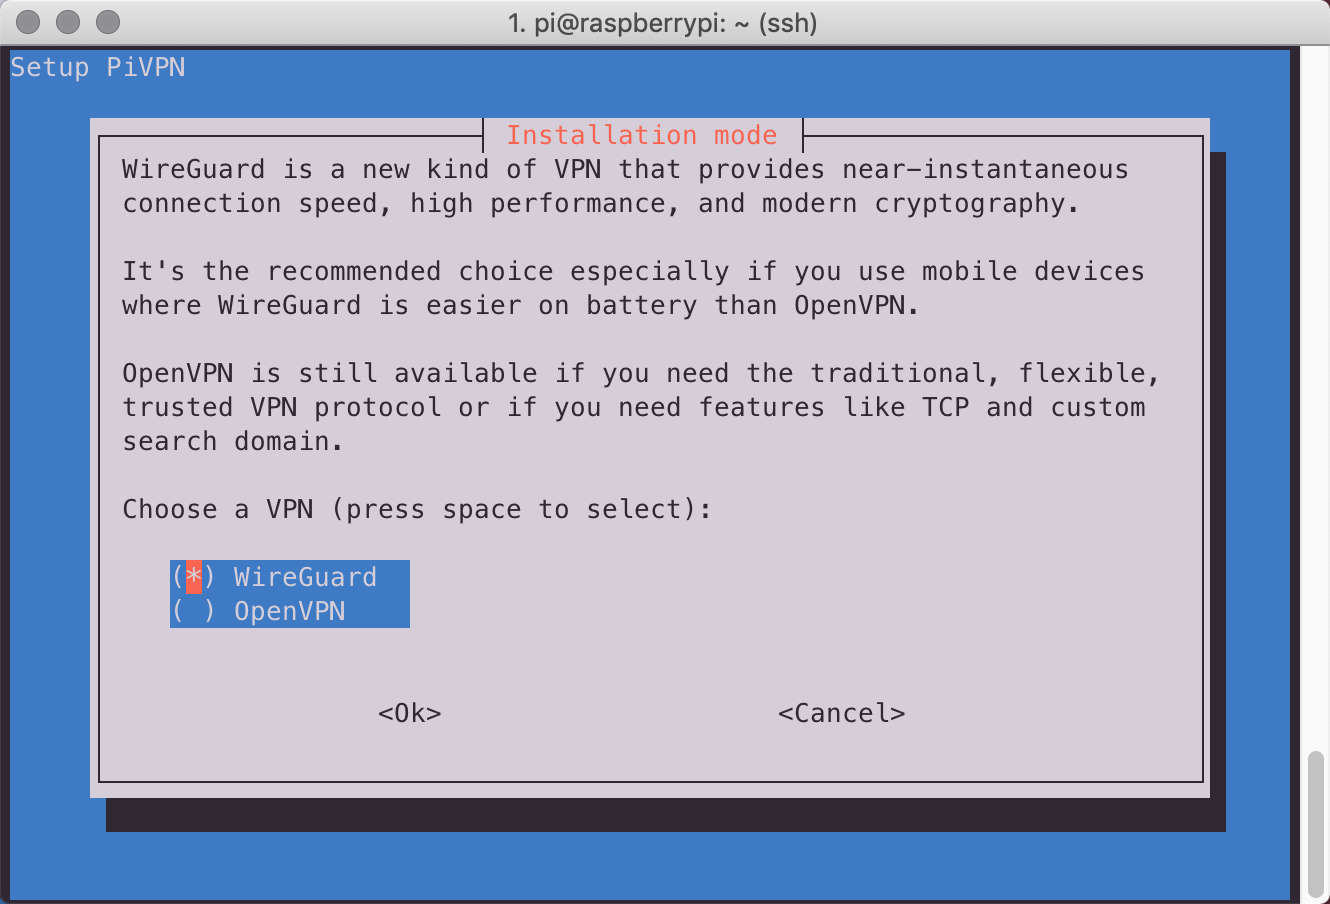
Select Wireguard.
Specify Output Port
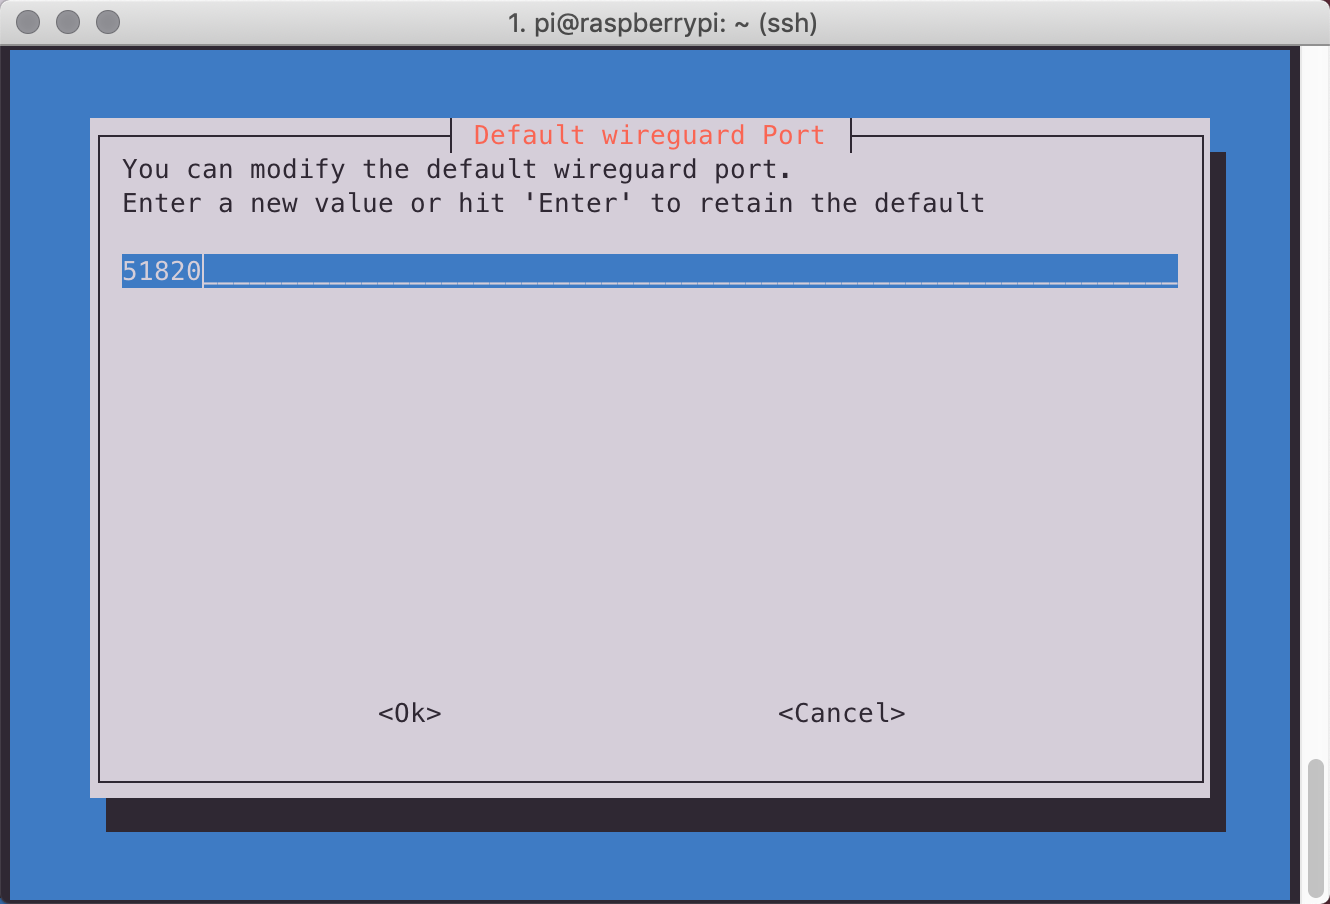
Please remember the port you entered here. You can change the port number, but do note that port from 0 to 1023 are reserved for the special usages.
Select DNS provider
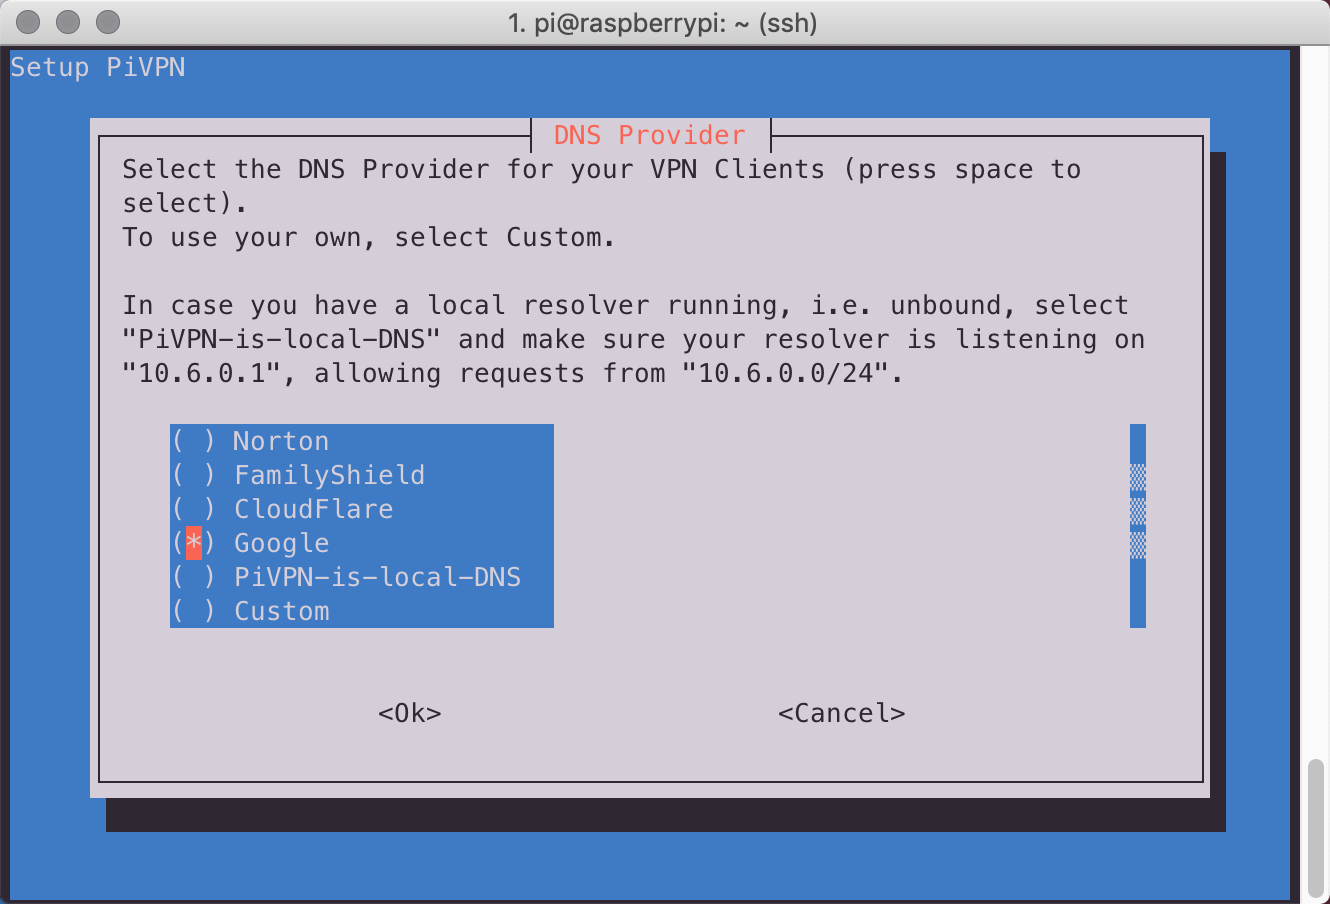
You can choose it by your preference. I just chose Google.
DNS entry
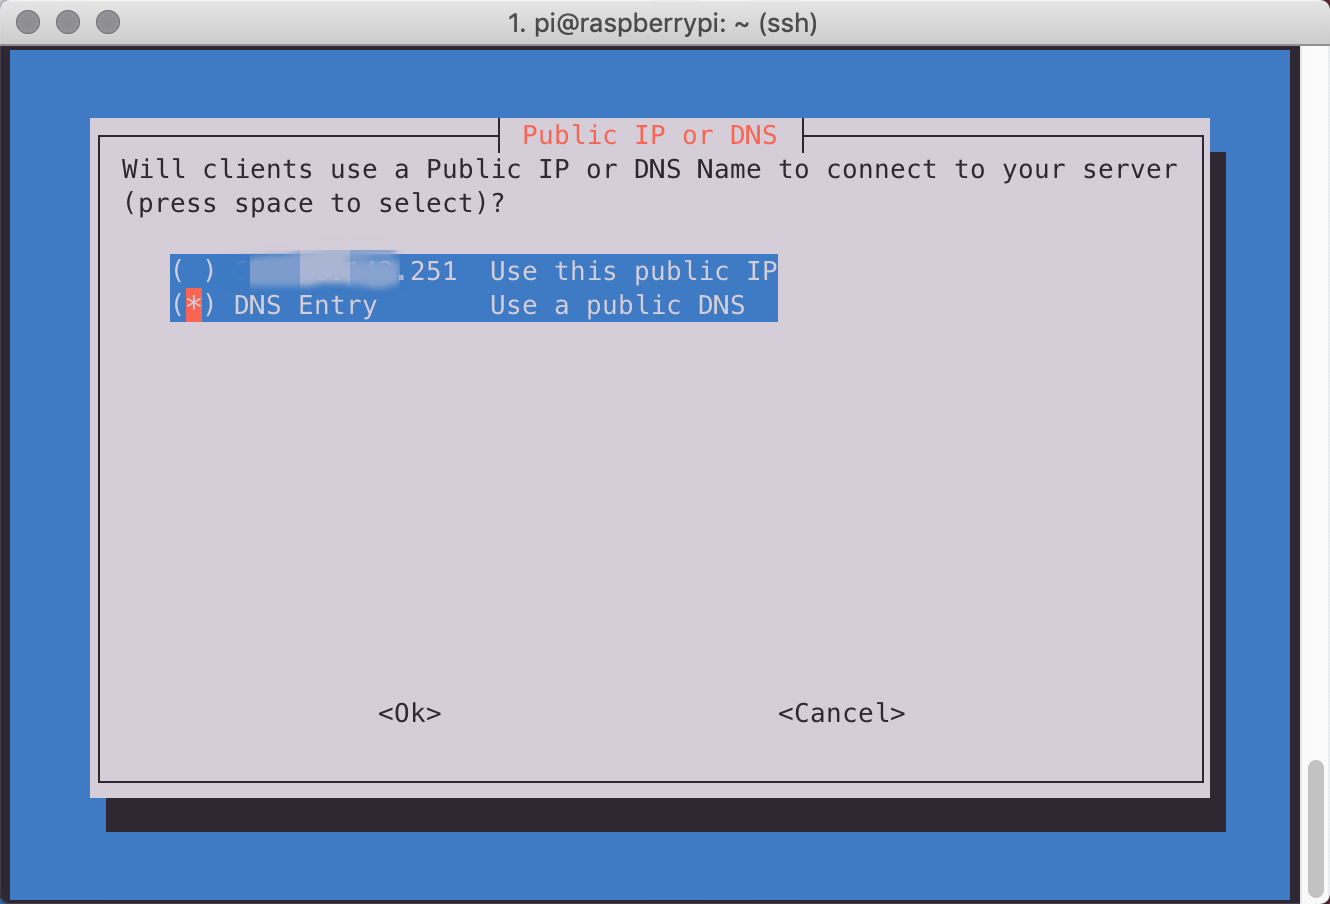
Select the public DNS entry.
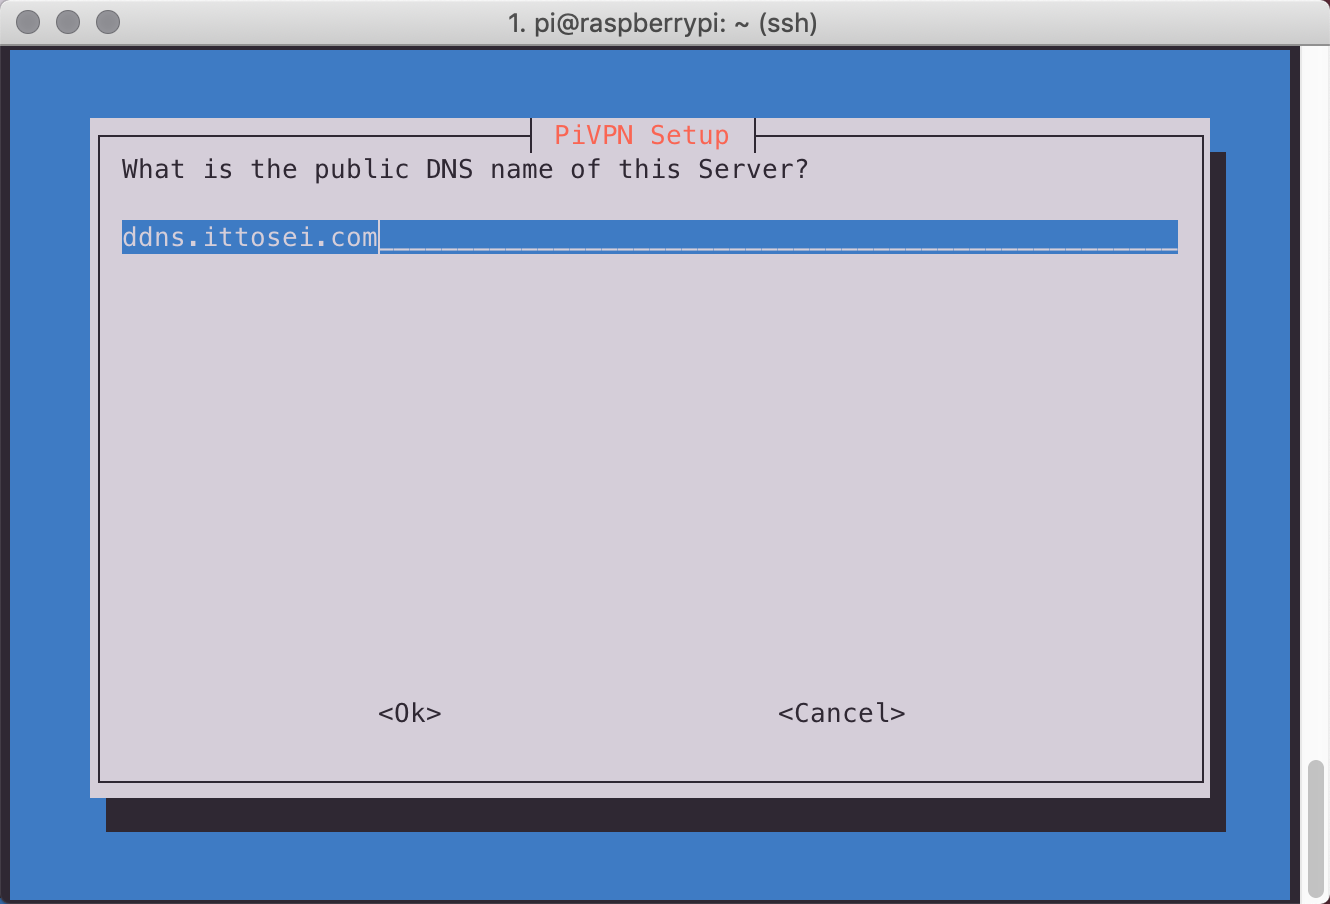
Enter the DDNS address you obtained from above.
Unattended Upgrade
Select yes for the unattended upgrade. You should see a prompt for Installation Complete and reboot the Pi.
Port Forwarding in Router
The Internet is composed with different subnetworks. You home is also a network composed by all of your devices. If you obtained your public IP, then you can probably wonder if both of your phone and laptop in your house have the same IP address. The answer is yes. All devices in your hose share the same IP address from your modem. The router doesn’t know how to handle the random incoming connection at port 51820. Thus we need to tell the router to forward the random incoming connection with port 51820 to our Pi to establish a VPN connection.
You are required to do this with either Wireguard or OpenVPN.
Go to your router homepage, and find port forwarding option. Forward the VPN port you choose and forward to the static private IP address of your Pi.
How to use PIVPN
Type pivpn.
A list of available commands will show up.
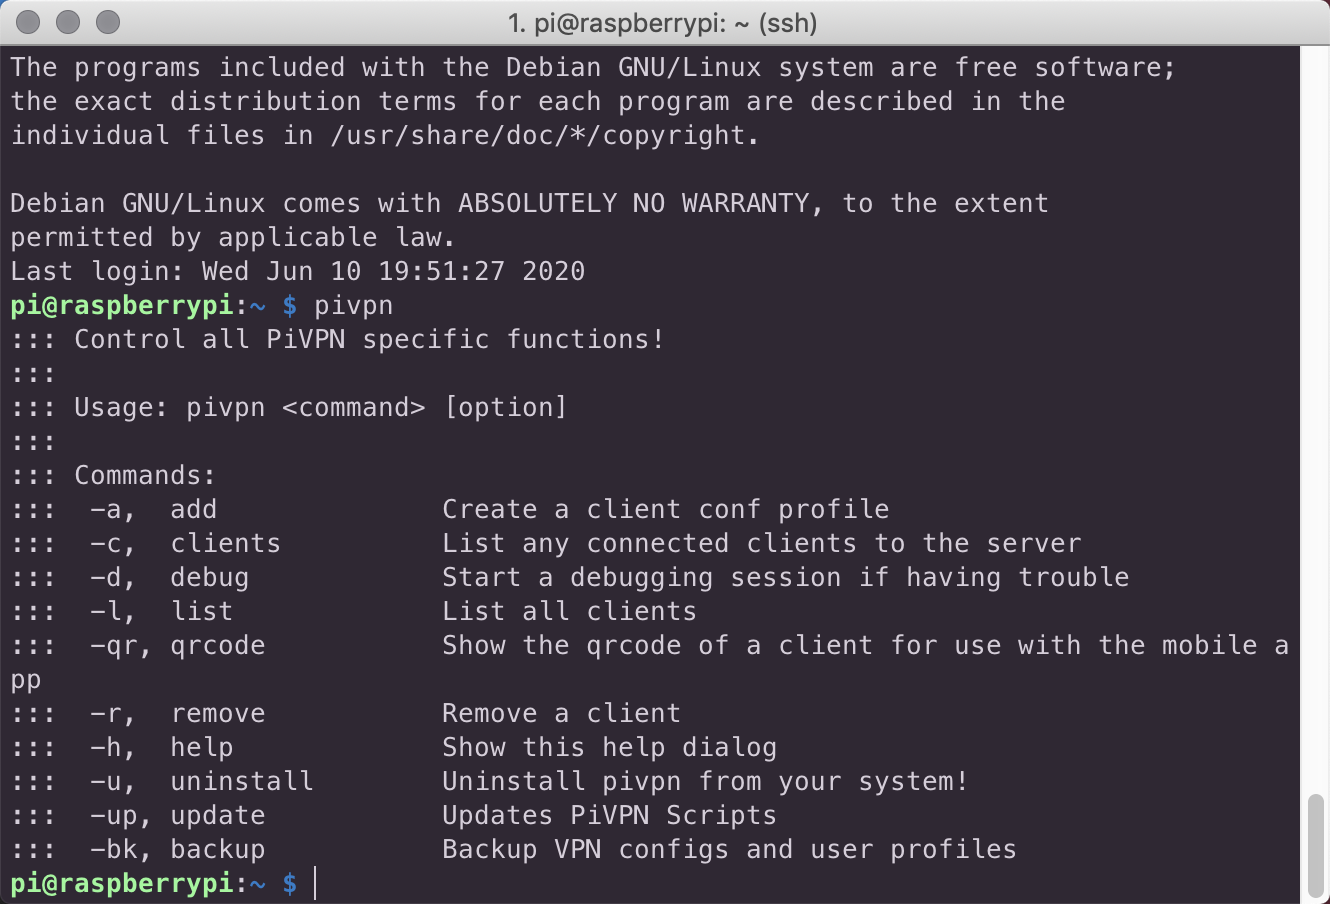
Type pivpn add to add a client.
Type pivpn -qr to see the QR code of your client.
Download the Wireguard app for IOS or Android and scan the QR code you obtained. Now your secure connection is establish.
At this stage, you are finished with the setup.